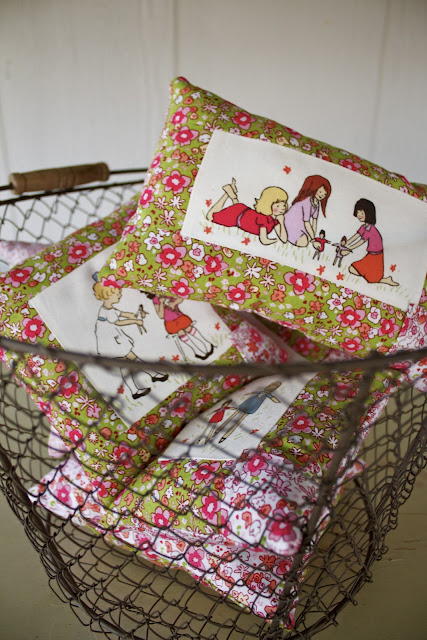
I received this cute little pillow on my 4th or 5th birthday. A mom of one of my friends made it for me. I am pretty sure I put every tooth I lost as a kid in that pillow. I used it as a pillow for my dolls & have kept it all these years. My two oldest have used it when they lost teeth. It's one of my treasures. I love it & keep it tucked in a special corner of my top dresser drawer, right next to my favorite jewelry.
Shouldn't every kid have a Tooth Fairy pillow? I think so. One of my goals is to make gifts that we give to friends. I thought it would be fun to have a tutorial so you can make one for your little one too!
What you'll need for this project::
3-4 different fabrics (this is a great project to use up some of your scraps, the pillows aren't very big)
thread
polly fill stuffing
knitting needle
scissors
For this project I wanted to try my hand at Fussy Cutting. You don't have to use this technique but I think it makes for a really cute look. I first learned about the technique while at the Sewing Summit this past fall. I purchased several fabrics from Sarah Jane's fabric line Children at Play, & Meadow while in Utah. I decided to use this fabric for my fussy cut.
Choose what part of the fabric you want to spotlight.
Choose what part of the fabric you want to spotlight.
Once you've chosen the part of the fabric you plan on spotlighting, measure it out & then cut.
It should look something like this.
Once you have your fussy cut block, you are ready to move on to your next step.
With the 2nd fabric cut a 2 inch wide strip.
For this pillow you will be doing a simple log cabin block. Take the 2 inch strip of fabric & place it on the main block on the right. It should look like this. Now sew them together.
Once you've sewn them together go ahead & cut the excess off.
Now press your seam
Take the 2 inch fabric strip & sew it to the right side (all strips will be attached in a clockwise pattern) Once it's attached cut off the excess trim & press your seam.
Your block should now look like this.
Repeat the previous step to add your 3rd strip of fabric. Trim & press.
Now your square should look like this.
Time to attach the last strip of fabric as you did in the previous step. Trim & press.
Once you've added the last strip the front of your block should look like this.
& the back should look like this. All neat & tidy like :)
It's time to make the tooth pocket. Take your 3rd fabric & cut a strip 2.5 inches wide.
Now cut your strip 4 inches long.
Fold your strip over & press so that you have a fabric box that measures 2"x 2.5"
Sew the open sides together as shown above.
Now you will take the top and fold it down just enough to sew a nice straight line.
Make sure the pressed side of your square is on the left side when pinning down.
It's time to attach your square with one simple stitch. It should look like the above photo. No need to attach the other sides as you will do this when sewing the back of the pillow to the front.
Take your 4th fabric (or 3rd if you only want to use 3 fabric choices) & cut a back for your pillow.
Use your straightedge to cut the fabric around your front pillow block. This is a great time to square up your front block.
You should now have two blocks.
Place your two blocks together with the front of the fabrics facing in. I know it sounds silly to add this step but I'm pretty sure we've all at one time or another sewn the wrong sides together ;) You can pin if needed but I found it easy to sew together without doing so.
Make sure you leave an opening at least 1"-1.5" wide.
Time to flip your pillow inside out. I do this by reaching my fingers inside, taking a top corner & pulling it through the opening.
Like this
Pull until it's completely pulled through the opening.
Once you've turned it, give it a nice pressing.
You are ready to stuff your pillow. Grab a good sized hand full of filling.
Find your opening & start stuffing :) You should add just enough filling to make your pillow full yet soft to the touch. Too much stuffing & your pillow won't look right.
I found that a larger knitting needle came in very handy for poking the filling into the corners. I used a ladder stitch & this tutorial to close the opening.
The front
You're finished! You have made a cute little tooth fairy pillow!
The back
This is an easy project to make assembly line style. I made 7 of these pillows in a little under 2 hours. My girls have already given them as gift's at two different birthday parties. I plan on making some for the boys too. Just have to get some more fabric.
This is my very first sewing tutorial so go easy on me, lol. Please feel free to let me know if something is confusing or incorrect & I will be sure to change it. If you decide to make these & sell them in your shop or blog about them, please link back to my tutorial. Thanks for stopping by! Be sure to follow my blog so you can see all my future tutorials as well.
Linked up to Canoe Ridge's Sew Modern Monday
Go check it out!


